CodeIgniter is a fast, lightweight, and open-source PHP framework used for developing web applications. It follows the model-view-controller (MVC) architectural pattern, which separates the application logic into three interconnected components: the model, the view, and the controller.
In this tutorial, we will show you how to install CodeIgniter on Ubuntu 22.04 OS.
Step 1: Update Operating System
Update your Ubuntu 22.04 operating system to the latest version with the following command:
# apt update && sudo apt upgrade -yStep 2: Install Apache webserver
You can install it via apt package manager by executing the following command.
# apt install apache2You can start the Apache service and configure it to run on startup by entering the following commands:
# systemctl start apache2
# systemctl enable apache2
Verify the status of the Apache service using systemctl status command:
# systemctl status apache2Output:
● apache2.service - The Apache HTTP Server
     Loaded: loaded (/lib/systemd/system/apache2.service; enabled; vendor preset: enabled)
     Active: active (running)
       Docs: https://httpd.apache.org/docs/2.4/
    Process: 81008 ExecStart=/usr/sbin/apachectl start (code=exited, status=0/SUCCESS)
   Main PID: 81012 (apache2)
      Tasks: 7 (limit: 2193)
     Memory: 26.4M
        CPU: 671ms
     CGroup: /system.slice/apache2.service
             ├─81012 /usr/sbin/apache2 -k start
             ├─81013 /usr/sbin/apache2 -k start
             ├─81014 /usr/sbin/apache2 -k start
Step 3: Install PHP and PHP extensions for CodeIgniter
To install PHP and additional PHP modules to support CodeIgniter, run the following command:
# apt-get install php php-cli php-common libapache2-mod-php php-curl php-zip php-gd php-mysql php-xml php-imagick php-json php-intlVerify if PHP is installed.
php -vOutput:
PHP 8.1.2-1ubuntu2.11 (cli) (built: Feb 22 2023 22:56:18) (NTS)
Copyright (c) The PHP Group
Zend Engine v4.1.2, Copyright (c) Zend Technologies
with Zend OPcache v8.1.2-1ubuntu2.11, Copyright (c), by Zend TechnologiesStep 4: Install MariaDB and create a database
To install MariaDB run the following command:
# apt install mariadb-server mariadb-clientVerify the status of the MariaDB service using systemctl status command:
# systemctl status mariadbOutput:
● mariadb.service - MariaDB 10.6.12 database server
     Loaded: loaded (/lib/systemd/system/mariadb.service; enabled; vendor preset: enabled)
     Active: active (running)
       Docs: man:mariadbd(8)
             https://mariadb.com/kb/en/library/systemd/
   Main PID: 979 (mariadbd)
     Status: "Taking your SQL requests now..."
      Tasks: 7 (limit: 2193)
     Memory: 72.6M
        CPU: 6.374s
     CGroup: /system.slice/mariadb.service
             └─979 /usr/sbin/mariadbd
By default, MariaDB is not hardened. You can secure MariaDB using the mysql_secure_installation script.
# mysql_secure_installationConfigure it like this:
- Set root password? [Y/n] Y
- Remove anonymous users? [Y/n] Y
- Disallow root login remotely? [Y/n] Y
- Remove test database and access to it? [Y/n] Y
- Reload privilege tables now? [Y/n] Y
Now run the command below to log in to the MariaDB shell.
# mysql -u root -pOnce you are logged in to your database server you need to create a database for the CodeIgniter installation:
MariaDB [(none)]> CREATE DATABASE codeigniter;
MariaDB [(none)]> CREATE USER 'codeigniter'@'localhost' IDENTIFIED BY 'Str0ngP@ssf1';
MariaDB [(none)]> GRANT ALL PRIVILEGES ON codeigniter. * TO 'codeigniter'@'localhost';
MariaDB [(none)]> FLUSH PRIVILEGES;
MariaDB [(none)]> exit;
Step 5: Download CodeIgniter
The latest version of CodeIgniter is available to download from GitHub. As of writing this tutorial, the latest version available is 4.3.5.
Run the following command to download it from the GitHub page to your Ubuntu system:
# wget https://github.com/codeigniter4/CodeIgniter4/archive/refs/tags/v4.3.5.zipAfter the download is complete, extract the file into the folder /var/www/ with the following command:
# unzip v4.3.5.zip -d /var/www Rename the extracted directory:
# cd /var/www/ && mv CodeIgniter4-*/ CodeIgniterThen enable permission for the Apache webserver user to access the files:
# chown -R www-data:www-data /var/www/CodeIgniter/Next, you need to edit the database configuration:
# cp CodeIgniter/env CodeIgniter/.env
# nano CodeIgniter/.env
Set environment:
#--------------------------------------------------------------------
# ENVIRONMENT
#--------------------------------------------------------------------
CI_ENVIRONMENT = development
Configure CodeIgniter base URL for accessing via your web browser:
#--------------------------------------------------------------------
# APP
#--------------------------------------------------------------------

app.baseURL = 'http://your-domain.com'
Set database connection:
#--------------------------------------------------------------------
# DATABASE
#--------------------------------------------------------------------

database.default.hostname = localhost
database.default.database = codeigniter
database.default.username = codeigniter
database.default.password = Str0ngP@ssf1
database.default.DBDriver = MySQLi
Save and close the file.
Step 6: Configure Apache for CodeIgniter
Run the commands below to create a new VirtualHost file called codeigniter in the /etc/apache2/sites-available/ directory.
# nano /etc/apache2/sites-available/codeigniter.confPaste the content as shown below:
 <VirtualHost *:80>
    ServerAdmin [email protected]
    DocumentRoot /var/www/CodeIgniter/public/

    ServerName your-domain.com
    ServerAlias www.your-domain.com

    <Directory /var/www/CodeIgniter/public/>
        Options FollowSymLinks
        AllowOverride All
        Order allow,deny
        Allow from all
    </Directory>

    ErrorLog /var/log/apache2/your-domain.com-error_log
    CustomLog /var/log/apache2/your-domain.com-access_log common

 </VirtualHost>
Remember to replace your-domain.com with the domain name of your server.
Save and exit the configuration file.
To enable this site run the command:
# a2ensite codeigniter.confTo implement the changes, restart Apache webserver:
# systemctl restart apache2Step 7: Access CodeIgniter
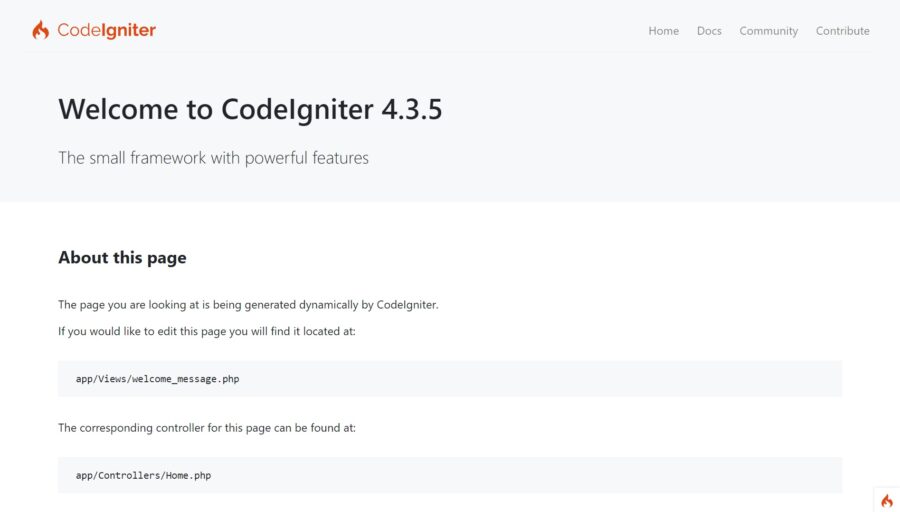
Open your web browser and type the URL http://your-domain.com/. You should see the following page:

Comments and Conclusion
Congratulations! You have successfully installed CodeIgniter on Ubuntu 22.04 OS.
You can start your development with CodeIgniter. For additional help or useful information, we recommend you refer to the User guide.
