

Drupal is an open-source content management system (CMS) used for building and managing websites and web applications. It is highly flexible and customizable, making it suitable for a wide range of web projects, from simple blogs to complex enterprise websites.
It is used by a wide range of organizations, including educational institutions, non-profits, businesses, and government agencies, to build websites that require robust content management, high security, and flexibility.
In this tutorial, we will show you how to install Drupal on your Ubuntu 24.04 OS.
Step 1: Update Operating System
Update your Ubuntu 24.04 operating system to make sure all existing packages are up to date:
# apt update && apt upgrade -yStep 2: Install Nginx webserver
You can install Nginx via apt package manager by executing the following command.
# apt install nginxYou can start the Nginx service and configure it to run on startup by entering the following commands:
# systemctl start nginx
# systemctl enable nginx
Verify the status of the Nginx service using systemctl status command:
# systemctl status nginxOutput:
● nginx.service - A high performance web server and a reverse proxy server
     Loaded: loaded (/usr/lib/systemd/system/nginx.service; enabled; preset: enabled)
     Active: active (running)
       Docs: man:nginx(8)
   Main PID: 10412 (nginx)
      Tasks: 2 (limit: 2218)
     Memory: 1.7M (peak: 1.9M)
        CPU: 23ms
     CGroup: /system.slice/nginx.service
             ├─10412 "nginx: master process /usr/sbin/nginx -g daemon on; master_process on;"
             └─10413 "nginx: worker process"
Step 3: Install PHP and PHP extensions for Drupal
By default, Ubuntu 24.04 comes with PHP version 8.3. You can install PHP and other supporting packages using the following command:
# apt install php php-{opcache,gd,curl,mysqlnd,intl,json,ldap,mbstring,mysqlnd,xml,zip}Verify if PHP is installed.
php -vOutput:
PHP 8.3.6 (cli) (built: Jun 13 2024 15:23:20) (NTS)
Copyright (c) The PHP Group
Zend Engine v4.3.6, Copyright (c) Zend Technologies
with Zend OPcache v8.3.6, Copyright (c), by Zend TechnologiesStep 4: Install MySQL and create a database
You can install the MySQL server with the following command:
# apt install mysql-serverStart the database server daemon, and also enable it to start automatically at the next boot with the following commands:
# systemctl start mysql
# systemctl enable mysql
Verify the status of the MySQL service using systemctl status command:
# systemctl status mysqlOutput:
● mysql.service - MySQL Community Server
     Loaded: loaded (/usr/lib/systemd/system/mysql.service; enabled; preset: enabled)
     Active: active (running)
    Process: 24565 ExecStartPre=/usr/share/mysql/mysql-systemd-start pre (code=exited, status=0/SUCCESS)
   Main PID: 24574 (mysqld)
     Status: "Server is operational"
      Tasks: 38 (limit: 2218)
     Memory: 362.8M (peak: 379.1M)
        CPU: 1.160s
     CGroup: /system.slice/mysql.service
             └─24574 /usr/sbin/mysqld
By default, MySQL is not hardened. You can secure MySQL using the mysql_secure_installation script.
# mysql_secure_installationConfigure it like this:
- Set root password? [Y/n] Y
- Remove anonymous users? [Y/n] Y
- Disallow root login remotely? [Y/n] Y
- Remove test database and access to it? [Y/n] Y
- Reload privilege tables now? [Y/n] Y
Now run the command below to log in to the MySQL shell.
# mysql -u root -pOnce you are logged in to your database server you need to create a database for the Drupal installation:
mysql> CREATE DATABASE drupaldb;
mysql> CREATE USER 'drupaluser'@'localhost' IDENTIFIED BY 'Str0ngP@ss';
mysql> GRANT ALL PRIVILEGES ON drupaldb. * TO 'drupaluser'@'localhost';
mysql> FLUSH PRIVILEGES;
mysql> exit;
Step 5: Download Drupal
The latest version of Drupal is available to download from their website. You can download it with the following command:
# wget https://ftp.drupal.org/files/projects/drupal-11.0.0.zipExtract file into the folder /var/www/ with the following command:
# unzip drupal-11.0.0.zip -d /var/www/Rename it to make it simpler:
# mv /var/www/drupal-11.0.0/ /var/www/drupalEnable permission for the Nginx webserver user to access the files:
# chown -R www-data:www-data /var/www/drupal/Step 6: Configure Nginx for Drupal
Create a new Nginx virtual host configuration file:
# nano /etc/nginx/conf.d/drupal.confPaste the content as shown below:
server {
  listen 80;
  server_name your-domain.com www.your-domain.com;
  root /var/www/drupal;
  index index.php index.html;
  charset utf-8;
  location / {
    try_files $uri $uri/ /index.php?$args;
  }
  location ~ .php$ {
    fastcgi_pass unix:/var/run/php/php8.3-fpm.sock;
    fastcgi_index index.php;
    fastcgi_param SCRIPT_FILENAME $document_root$fastcgi_script_name;
    include fastcgi_params;
  }
}
Remember to replace your-domain.com with the domain name of your server.
Save and exit the configuration file.
To implement the changes, restart Nginx webserver:
# systemctl restart nginxStep 7: Access Drupal Web Interface
Open your web browser and type the URL https://your-domain.com. You should see the Drupal installation page.
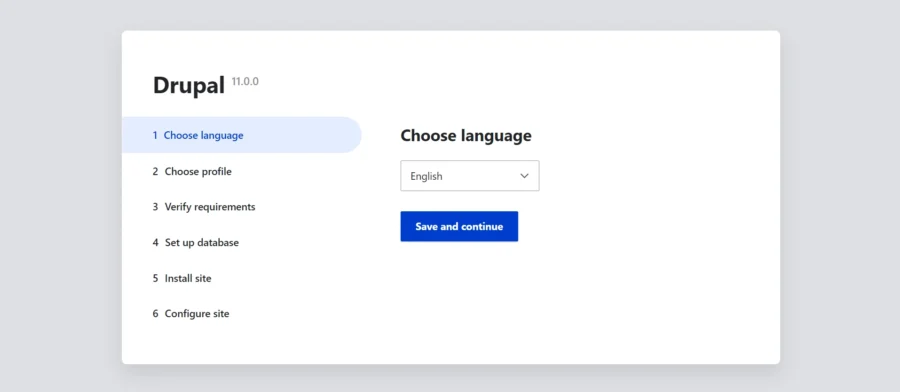
Choose your preferred language and hit Save and continue. You will get the following screen:
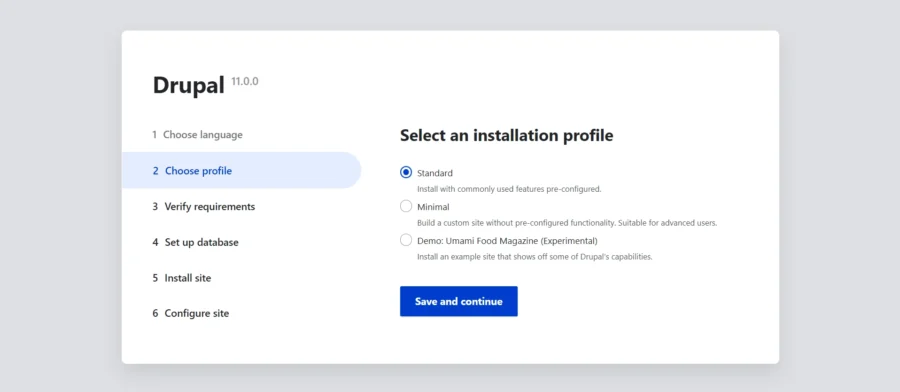
Choose Standard and hit Save and continue.
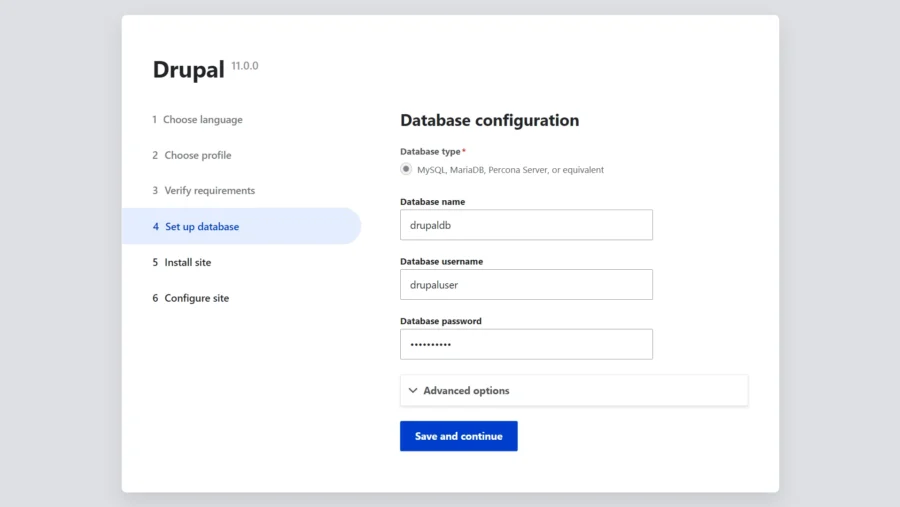
Fill in your database settings and hit Save and continue.
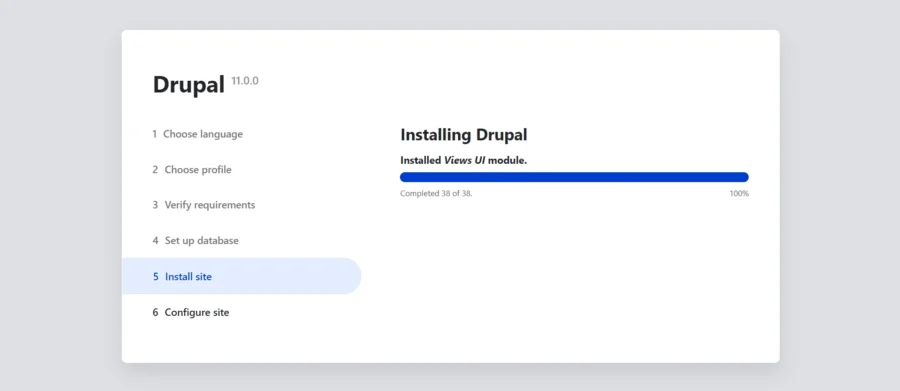
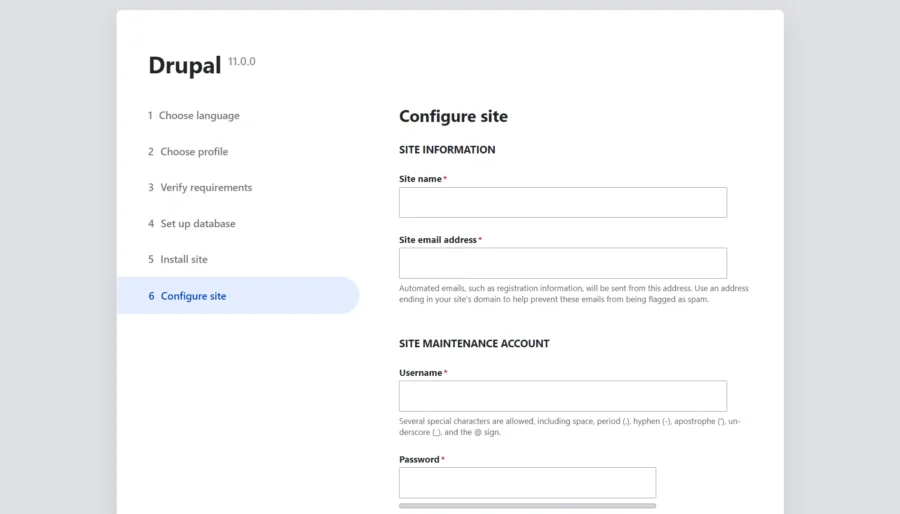
Then fill in some basic information about your site and then hit Save and continue.
You will get the dashboard in the following screen:
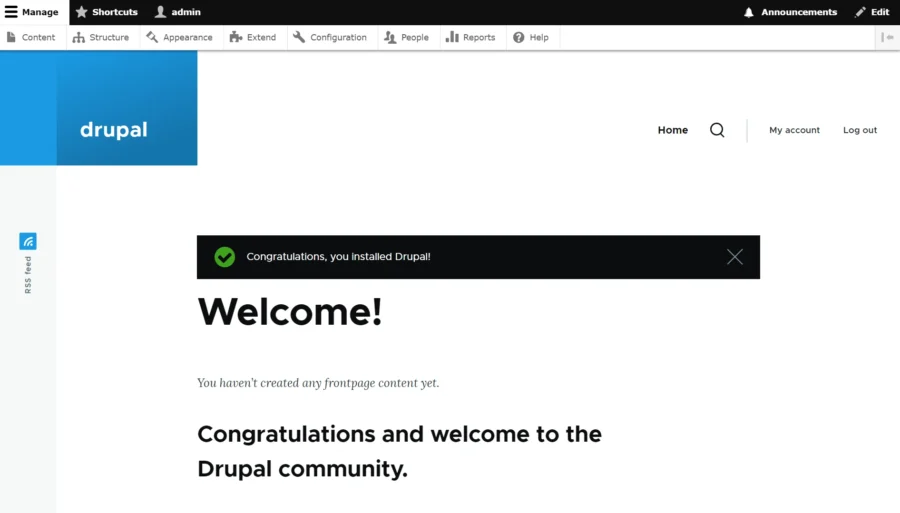
Installation of Drupal has been completed. Now revert the permissions for the settings.php file:
# chmod 644 /var/www/html/drupal/sites/default/settings.phpComments and Conclusion
That’s it. You have successfully installed Drupal on Ubuntu 24.04 OS.
For additional help or useful information, we recommend you to check the official Drupal documentation.
If you have any questions please leave a comment below.