Jupyter Notebook is an open-source web application that allows you to create and share documents that contain live code, equations, visualizations, and narrative text. It’s widely used in various fields such as data science, machine learning, scientific computing, and education.
The term “Jupyter” is derived from the combination of three programming languages: Julia, Python, and R. These were the first languages supported by the Jupyter project, but now it supports many other programming languages through its interactive computing protocol.
In this tutorial, we will show you how to install Jupyter Notebook on Debian 12 OS with Apache web server
Step 1: Update Operating System
Update your Debian 12 operating system to the latest version with the following command:
# apt update && apt upgrade -yStep 2: Install Pip on Debian 12
Python comes already installed by default on Debian 12. You can verify it by checking its version:
# python3 -VOutput:
Python 3.11.2If it doesn’t, install Python with the following command:
# apt install python3Then use the following command to install pip and venv on Debian 12:
# apt install python3-venv python3-pipVerify your pip installation by checking its version:
# pip3 --versionOutput:
pip 23.0.1 from /usr/lib/python3/dist-packages/pip (python 3.11)Step 3: Install Jupyter Notebook Using Virtualenv
First, create a directory and switch to it with the commands below:
# mkdir /var/www/notebook
# cd /var/www/notebook
Before you install Jupyter Notebook, you first need to create a Python virtual environment.
# python3 -m venv notebook_envNext, activate the virtual environment with the following command:
# source notebook_env/bin/activateNext, install Jupyter Notebook using the following command:
(notebook_env) # pip install jupyterOnce the installation is completed, run the Jupyter Notebook with the following command:
(notebook_env) # jupyter notebook --allow-rootPress the CTRL+C to stop the Jupyter Notebook.
Step 4: Generate Jupyter Notebook Password
First, generate a Jupyter Notebook configuration file with the following command:
(notebook_env) # jupyter notebook --generate-configYou should see the following output:
Writing default config to: /root/.jupyter/jupyter_notebook_config.pyThen run the following command and enter your preferred password:
(notebook_env) # jupyter notebook passwordSet a password as shown below:
Enter password:
Verify password:
[JupyterPasswordApp] Wrote hashed password to /root/.jupyter/jupyter_server_config.json
This can be used to reset a lost password or if you believe your credentials have been leaked and desire to change your password.
You can prepare a hashed password manually, using the function jupyter_server.auth.passwd():
>>> jupyter_server.auth import passwd
>>> passwd()
Enter password:
Verify password:
'argon2:$argon2id$v=19$m=10240,t=10,p=8$WGqsBZQPacu0FwsczXPlIQ$VXMyCfkJJZETyjdB6aWNSu/t0OrLAVhpkM15wKJYQRU'
Then add the hashed password to your jupyter_notebook_config.py file:
nano /root/.jupyter/jupyter_notebook_config.pyc.ServerApp.password = 'argon2:$argon2id$v=19$m=10240,t=10,p=8$WGqsBZQPacu0FwsczXPlIQ$VXMyCfkJJZETyjdB6aWNSu/t0OrLAVhpkM15wKJYQRU'Now, deactivate from the Python virtual environment with the following command:
deactivateStep 5: Create a Systemd service
Next, it is a good idea to create a systemd service file to handle the Jupyter Notebook service. You can create it with the following command:
# nano /lib/systemd/system/jupyter.serviceAdd the following lines:
[Unit]
Description=Jupyter Notebook

[Service]
Type=simple
PIDFile=/run/jupyter.pid
ExecStart=/var/www/notebook/notebook_env/bin/jupyter-notebook --config=/root/.jupyter/jupyter_notebook_config.py --allow-root
User=root
Group=root
WorkingDirectory=/var/www/notebook/notebook_env
Restart=always
RestartSec=10

[Install]
WantedBy=multi-user.target
Save and close the file and then reload the systemd daemon with the following command:
# systemctl daemon-reloadThen start the jupyter service and activate it at system startup with the following command:
# systemctl start jupyter
# systemctl enable jupyter
Edit the configuration file and enable remote access:
nano /root/.jupyter/jupyter_notebook_config.pyUncoment and change the following line to True:
c.ServerApp.allow_remote_access = TrueTo implement the changes, you need to restart the jupyter service:
# systemctl restart jupyterStep 6: Configure Apache as a Reverse Proxy for Jupyter Notebook
Jupyter Notebook is started and running on port 8888.You can install it via apt package manager by executing the following command.
# apt install apache2You can verify the status of the Apache service using the systemctl status command:
# systemctl status apache2Next run the following commands to enable necessary modules:
# /usr/sbin/a2enmod proxy
# /usr/sbin/a2enmod proxy_http
Run the commands below to create a new VirtualHost file called jupyter in the /etc/apache2/sites-available/ directory.
# nano /etc/apache2/sites-available/jupyter.confPaste the content as shown below:
 <VirtualHost *:80>
    ServerAdmin [email protected]
    DocumentRoot /var/www/html/

    ServerName your-domain.com
    ServerAlias www.your-domain.com

    ProxyPass / http://127.0.0.1:8888/
    ProxyPassReverse / http://127.0.0.1:8888/>

    ErrorLog /var/log/apache2/your-domain.com-error_log
    CustomLog /var/log/apache2/your-domain.com-access_log common

 </VirtualHost>
Remember to replace your-domain.com with the domain name of your server.
Then save and exit the configuration file.
To enable this site run the following command:
# ln -s /etc/apache2/sites-available/jupyter.conf /etc/apache2/sites-enabled/jupyter.confTo implement the changes, you need to restart the Apache webserver:
# systemctl restart apache2Step 7: Accessing Jupyter Notebook Web Interface
Open your web browser using the URL http://. You should see the Jupyter login page:your-domain.com

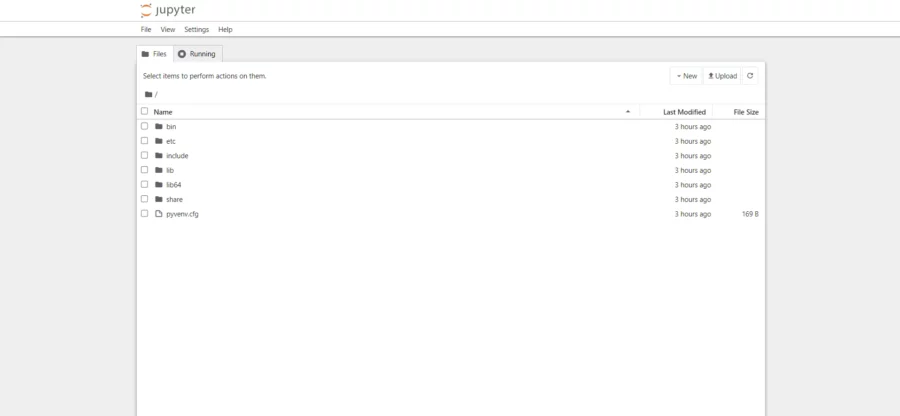
Enter your password and click on the Login button. You should see the dashboard on the following screen:

Comments and Conclusion
That’s it. You have successfully installed Jupyter Notebook on Debian 12.
For additional help or useful information, we recommend you to check the official Jupyter Notebook documentation.
If you have any questions please leave a comment below.

Thank you so much big help